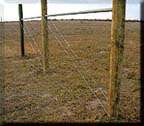
Having tools specifically designed for use with Hi-Tensile wire will greatly ease the work and speed the installation of a high quality, High-Tensile wire fence. A complete tool kit is available from your dealer.

To begin construction, locate and set, end and corner posts. Use treated posts of no less than 6" in diameter or 2 7/8" pipe, set 4' to 6'deep. Depth of setting depends on soil types, rocky soils 4' sandy soils 6'. After setting posts a guide wire of Hi-Tensile barb-wire is pulled tight between posts. This wire becomes the fence line.

Braces are the backbone of any fence and must be built correctly. Braces may be single or double, however the width should ALWAYS be 2-1/2 times the height of the fence. Cross members should be pipe, tubing, or round wood posts. Never 4 X 4 or landscape timbers. Double wraps of 12-1/2 Hi-Tensile or 9 ga. low-tensile wire make the twitch wire. Twitch wire MUST be anchored securely or the brace will fail.

Generally, the use of 20' post centers is more than adequate for Hi-Tensile fencing, however this is only a guideline. A rigid post should be placed at the lowest point of a dip and the crown of a hump. These posts should be larger than the line posts and set a little deeper. They will hold the fence up or down as required. Standing on the guide wire in dips will show you where to put the rigid post.

Generally, Hi-Tensile wire is tied off at both ends of the fence and is tensioned to the middle of the pull. This allows the fence to be tied off without being under tension. Use the Hi-Tensile slip knot to tie off the wire. Keep the vertical wire straight so the wire will tension the same throughout the fence.


Splicing can be done two ways, one by placing vertical stays over each other and wrapping the loose end of the wire around the corresponding horizontal wire 6 times. Secondly a splicing sleeve can be installed between the vertical stays and crimped with a crimping tool. Use sleeves designed for 12-1/2 ga. Hi-Tensile wire only. Only Nicropress or EZ Pull tools should be used to achieve adequate holding strength.

Tensioning Hi-Tensile wire is made easy by utilizing our unique Tensioning Bars. Up to 4 rolls of wire may be tensioned and squared with these bars. Install the bars approximately 15' apart. Hook up 3 Bar Pullers and start tensioning the wire. Work all 3 pullers evenly. When the wire becomes firm, stand the Tension Bars up, and do the final tensioning. The tension crimp should be 1/2 the size of an untensioned crimp. Splice wire and remove Tension Bars.

Position the wire 1" off the ground (against the ground for best predator protection) and staple to post. Use barbed staples and leave room for the wire to move freely under the staple. Staple all high points first and then pull the wire down and staple it last. If there are a lot of dips a little less tension would be applied as pulling the wire down will tighten the wire more. If you are tying to steel posts follow the same procedure but tie the wire tight.